Required settings
- Account identifier
- Virtual warehouse
- Service account
- Database name
- Schema name
Account identifier
Account identifier
You can find your account identifier at the bottom left corner of your Snowflake console.
Service account script
Service account script
Enabling key-pair authentication
Enabling key-pair authentication
To use key-pair authentication, you will want to generate an RSA key pair.Then upload the public key to SnowflakeOnce this is done, provide us the private key to authenticate with.
Advanced features
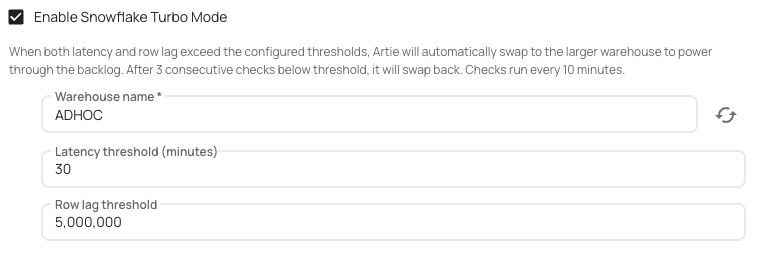
Snowflake turbo mode
Snowflake turbo mode allows you to switch between warehouse sizes based on your data volume and lag.
How it works
1
Monitoring
Every 10 minutes, Artie queries the pipeline’s current ingestion latency (in minutes) and pending row count.
2
Scale up
If both the latency and row backlog exceed their thresholds, the pipeline is switched to the configured turbo warehouse and you are notified.
3
Scale down
Once both metrics drop below thresholds for 3 consecutive checks, the pipeline is returned to its normal warehouse and you are notified again.
Configuration
You can activate this feature by going to your pipeline’s destination advanced settings.
Key behaviors
- Both thresholds must be exceeded simultaneously to activate turbo mode - a spike in only one metric will not trigger a scale-up.
- Scale-down requires 3 consecutive below-threshold checks to avoid flapping between warehouses.
- You will receive a notification whenever turbo mode is activated or deactivated.
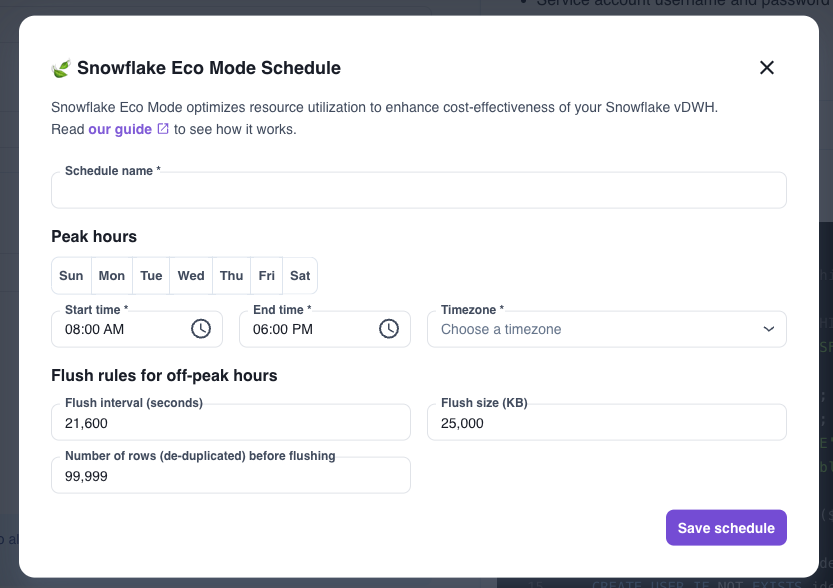
Snowflake eco mode
Snowflake eco mode is a great option if you only need faster data syncs during business hours. Click here to learn more!
Steps to enable eco mode
Steps to enable eco mode
- Edit your pipeline
- Go into the
Destinationstab - Open
Advanced settingsand select+ New schedule - Define your peak hours and your time zone
- Define your flush rules for off-peak hours
- Save schedule
- Deploy your changes
Troubleshooting
How should I size my virtual warehouse?
How should I size my virtual warehouse?
To start, We would recommend you to go with a
x-small and decide whether or not you need to scale based off of our Snowflake insights metrics from our Analytics portal.Generally speaking, if your overall query execution time is high, then you may want to scale to a larger instance. If your queued overload time is high, you may want to have more virtual warehouse nodes to increase your parallelizable slots.Why am I not able to query or operate table?
Why am I not able to query or operate table?
Snowflake’s native RBAC makes it so that the account that created the resource is the native owner. To change this, assign the ARTIE service account’s role to your account and you will be able to operate on the table. See the GIF below on how to fix this problem.